Welcome to the August Social Connection Blog Hop!
Join us for this month long blog hop where you can link up all of your social media and blog.

————————–→HTML End
Rays of Bliss
blissful life + designs
————————–→HTML End


This has been shared on the following sites:


Next DIY Project Featured from my sister’s little Country Wedding is the Ring Bearer Pillow. This was made very easily and for about $5 by my sister’s best friend, Sharon!
Supplies:
Desired color fabric
Burlap ribbon with wire
Color craft ribbon
Hot glue gun
Cotton Stuffing
Sewing machine
Flowers and/or ribbon bow
Directions: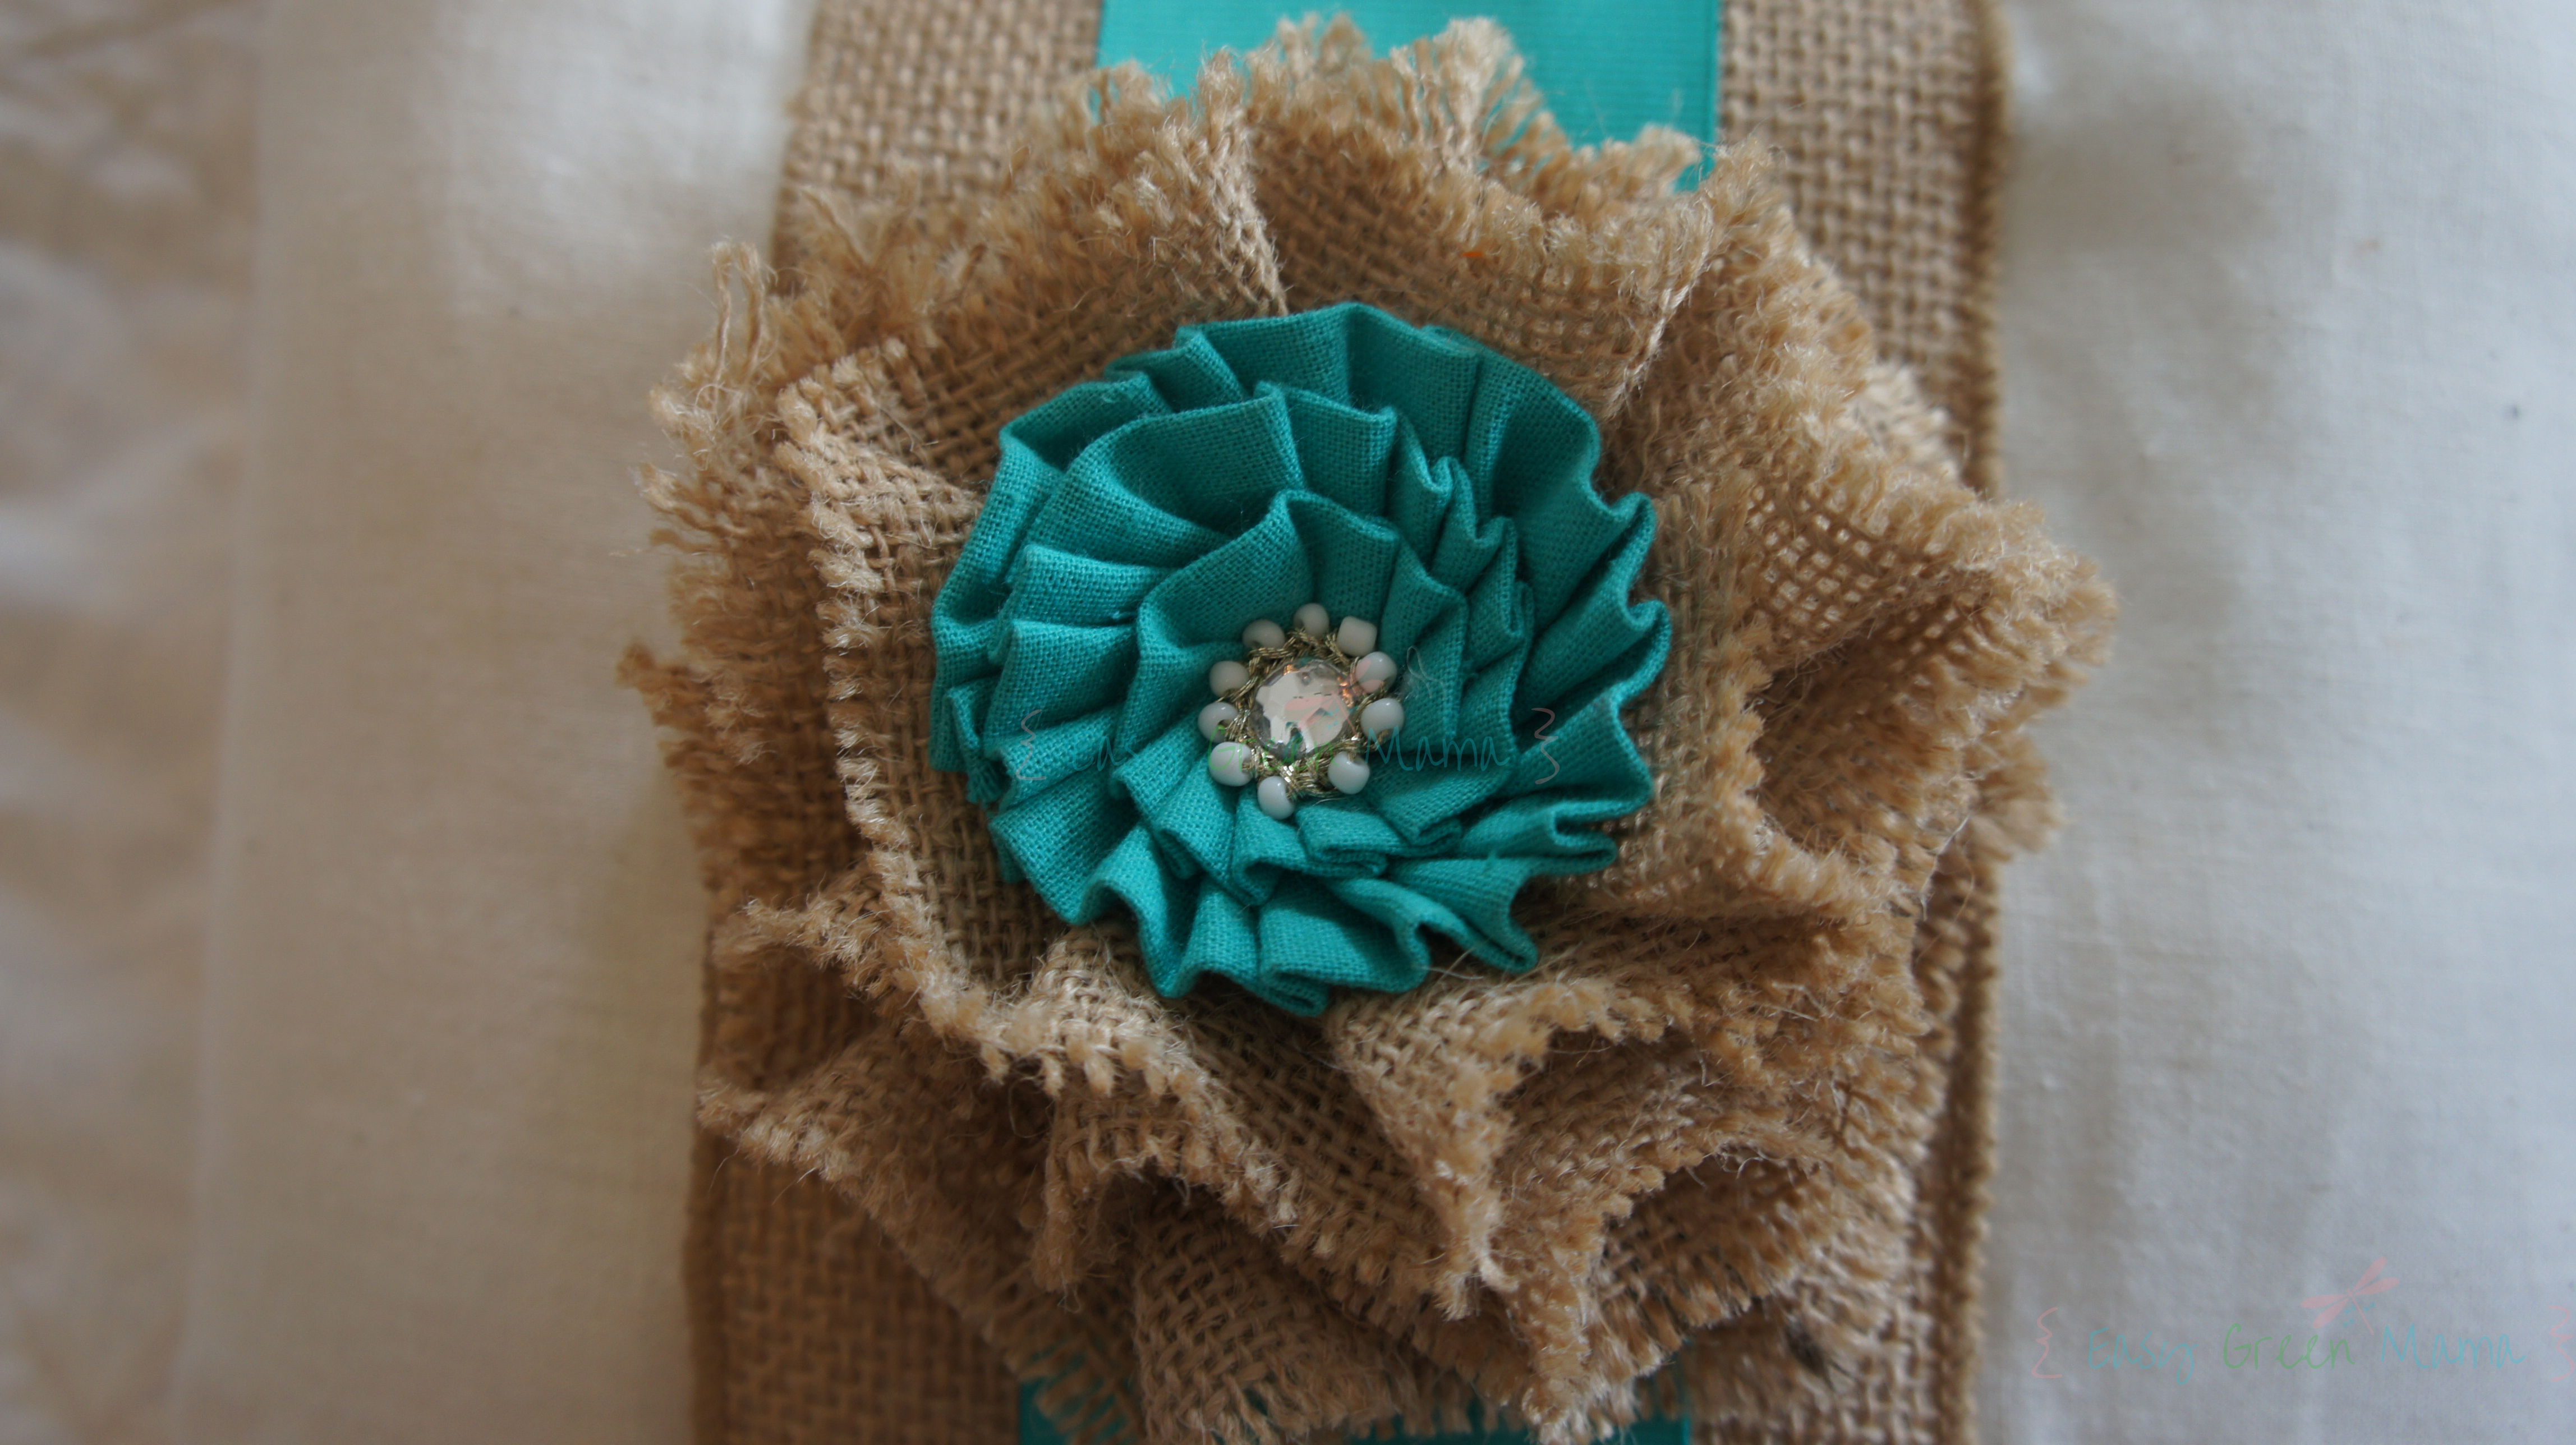
1. Cut out 2 squares to the desired size you would like your pillow to be.
2. Sew all edges shut except a small opening so you can turn ride side out.
3.Fill with cotton stuffing through small opening.
4. Sew the small hole shut.
5.Hot glue the burlap ribbon down I used the one with wire so it would help the pillow keep it’s shape.
6. Center and hot glue colored ribbon on top of burlap ribbon.
7. Hot glue on flowers and/or bows on top.
*I got my burlap flower and scrap book flower from hobby lobby because this was a last minute DIY wedding project.
You can u tube how to make burlap flowers/Rosettes instead of buying them.

This has been shared on the following sites:

Sausage Balls are a signature snack for most my families parties. My mom makes them every Christmas morning and we have them at all our Showers (bridal or baby). Not wanting my husband to miss out on all the wonderfulness of the Sausage Balls (because he cannot have gluten) I always make him his own batch. Yes, I know…I’m an awesome wife!
Important Note: Be careful when purchasing your sausage if you do have a gluten intolerance. Some sausages use gluten or high MSG which can bother those with a gluten intolerance. I used Jimmy Dean All Natural Sausage. It says Gluten Free and No MSG added on the label.


Hope you enjoy this recipe! Check out my other gluten-free recipes HERE.


This is the second DIY Project featured from my sister’s little Country Themed Wedding! These DIY Colored Mason Jars made perfect centerpieces for her wedding reception tables! We are actually reusing these jars for my other sister’s baby shower next week!
Supplies you will need:

*my sister’s oven got super hot and burned the glasses at 225° but Sharon’s didn’t so it depends on how hot your oven gets. We suggest starting at 200° and do not exceed 225°
Directions:
Step 1: Line baking sheet with foil paper or wax paper. Make sure to cover the whole pan because mod podge is glue so it’s hard to to get off baking sheet. We suggest using an old baking sheet not used much.
Step 2: Add recommended drops of food coloring to mod podge bottle *It’s important not to add too much food coloring or the mixture will be too thin and result in streaking.

Step 3: Mix colored Mod Podge until color is mixed in and then pour into your glass jar.

Step 4: Swirl the Mod Podge around until the entire inside of your jar is covered. Drain excess by placing jars upside down onto paper plate or newspaper. Wait 5 min or until most is drained and jar is covered (this will help get the rim which is hard to get while swirling)
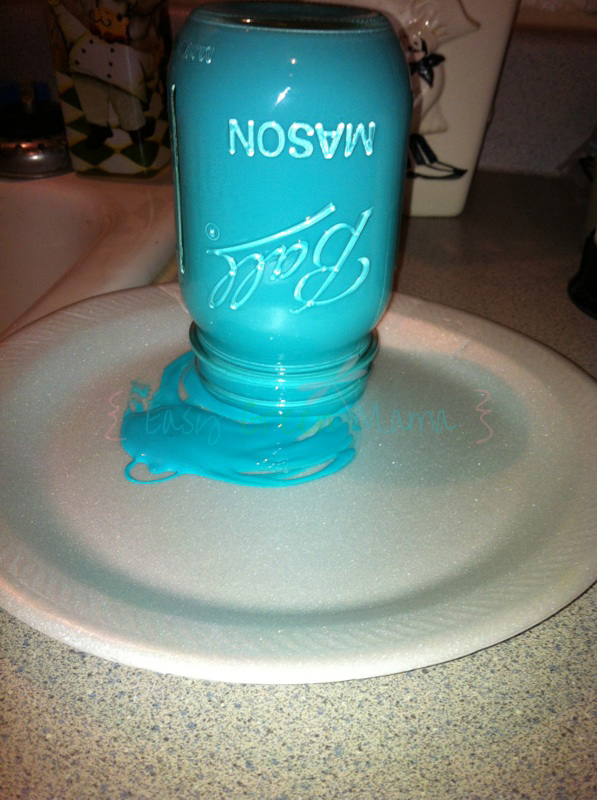
Step 5: Carefully wipe the rim of your jar with a towel making sure none of the Mod Podge is on the outer lip. (We did 2 test jars first to make sure they came out good)
Step 6: After draining, carefully lift jars, re-wipe the rims and place upside down on lined baking sheet.

Step 7: Place in pre-heated oven for 20 minutes or until most extra paint has drained out (it may be a lot still) then flip jar over and bake for another 20 min. You can repeat until Mod Podge is completely dry and glass jars are transparent. Make sure to flip while baking because it will bubble up.
Step 8: Remove baking sheet from oven and allow hot jars to cool completely before handling. If they do not come out right just soak in water for a few hours and the glue will peel away.
*We added lace with a hot glue gun to give a little more character.
This has been shared on the following sites:

I have been meaning to give a cake bar recipe a try. Since I love peanut butter and chocolate chips this recipe was a perfect choice! It turned out so yummy! As always this recipe is Gluten Free, but can be made regular by using standard all purpose flour.


